
Without a doubt, Microsoft (MS) Word dominates the world of document preparation. As a “what you see is what you get” word processor, Word provides everything many authors need. For many AJE customers, the availability of Track Changes in MS Word is particularly useful. However, it can be challenging to properly format and typeset certain text in MS Word.
Consequently, many researchers prefer to use LaTeX, which can provide a professional layout with high typographical quality and easily adoptable functions for implementing footnotes, citations, tables, and graphics. Despite the many advantages of editing in LaTeX, it can be difficult to display revisions to the text in LaTeX editors such as GNU Emacs, Vim, and TeXworks. In other words, it is easier to track changes in MS Word than LaTeX editors.
The Perl script called latexdiff offers a solution for tracking changes in TeX files.
The latexdiff utility was introduced in early 2013 to highlight changes in lengthy text edited by multiple authors. This tool can be used to compile “compare” files in the same professional PDF format as typical LaTeX files while showing the differences between the original file(s) and the edited file(s) by displaying insertions and deletions in different colors (such as blue and red font, respectively).
This article is intended to help you set up and utilize latexdiff. There are a few preparatory steps before getting started.
1. Ensure that a TeX system such as the open-source MiKTeX 21.6 distribution for MS Windows or MacTeX-2021 for Mac OS X is already installed.
2. Perl (version 5.8 or higher) must be installed on MS Windows platforms (Mac OS X includes Perl by default). The installation executable for your system can be found here.
3. Download the latexdiff source code for MS Windows here. For Mac OS X, the code can be downloaded from any CTAN repository in the TeX Live Utility.
4. Unzip the latexdiff files and copy them to the Perl > bin folder (the default installation is on the C:\ drive).
If using MS Windows:
- Open the MiKTeX Package Manager. Locate and right-click on the latexdiff package. Select “Install package”.
- A popup will appear stating that 1 package will be installed and that 0 packages will be removed. Click “OK”.
- After the installation, go to Tasks → Refresh file name database
If using Mac OS X:
- Open the TeX Live Utility.
- Search for “latexdiff”.
- Ctrl+click on “latexdiff” and select “Install package”.
Before moving on, we strongly recommend creating a unique folder for each LaTeX document (e.g., each paper or book). This is because the compiler generates generically named supporting files during the compiling process, which may overwrite other files with the same names.
When generating the compare PDF, there are two main approaches: compiling single-file documents (i.e., where the TeX file contains both the preamble and the entire body of the paper) and compiling multi-file documents (i.e., where each book chapter, section of a paper, etc., is contained in a separate TeX file; examples typically include dissertations and books broken up into chapters). Guidelines for both cases are provided below.
Compiling single-file documents
This approach is relatively straightforward.
1. Begin by making sure that both the original file and the edited file are in the same folder.
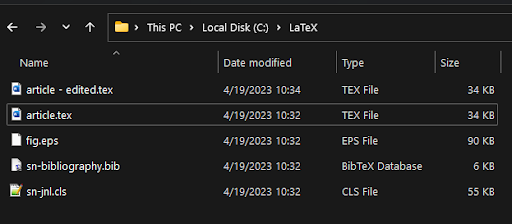
The original article (“article.tex”) and edited version (“article - edited.tex”), as well as some supplementary files, in a single folder.
2. Open the command terminal on your operating system (this is called “Command Prompt” or “Terminal” in Windows and “Terminal” on a Mac computer) and navigate to the folder containing the paper to be compiled. The commands used to navigate between folders may vary depending on your operating system. A common command is "cd"; for example, "cd C:\Documents" can be used to navigate to the Documents folder in the C drive.
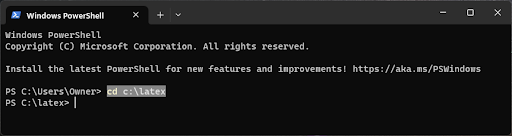
An example of a command terminal window. The selected text was typed by the user to navigate to the “latex” folder in the C drive.
3. Call the latexdiff utility with a command in the following format:
- latexdiff original_file.tex edited_file.tex > compare.tex
This command will compare the files named "original_file.tex" and "edited_file.tex" to produce a new file showing the changes that were made in the edited file. This new file will be named "compare.tex". Please note that the file compare.tex will include a lot of code that is difficult to read and modify. Therefore, we strongly recommend making any necessary changes to edited_file.tex (i.e., the revised file) and then running latexdiff to generate compare.tex instead of modifying compare.tex directly.

The same folder as in the previous image, with the new file “compare.tex”, which was created with latexdiff from “article.tex” and “article - edited.tex”.

Part of compare.tex that shows some latexdiff commands such as “\DIFdelbegin” and “\DIFdelend”, which indicate deleted text.
4. Call your preferred LaTeX compiler, such as pdfLaTeX, to convert the compare.tex file into a PDF. If you would like citations to appear properly, you can call bibtex or biber as normal.

The PDF that results from compiling compare.tex. Red strikethrough text indicates a deletion, and blue underlined text indicates an addition.
Compiling multi-file documents
This scenario is a bit more complicated. This approach involves using a main TeX file (e.g., main.tex) that contains the preamble, the \begin{document} and \end{document} commands, and various \input{ } commands that insert other TeX files (e.g., chapters of a book or sections of an article).
1. Begin by placing all the original files in a subfolder, e.g., original/, and all the edited files (with the same names as their corresponding original files) in another subfolder, e.g., edited/. Note that the main TeX file mentioned above may not have been edited (for example, if all editable text is contained within the constituent files). Whether or not this main file has been edited, both the original/ and edited/ subfolders should contain the main file.

The “original” and “edited” folders containing the LaTeX files.

The contents of the “edited” folder. The main file is “book.tex”; it has not been edited, but some of the other files have been edited.
2. Navigate to the parent folder (containing the original/ and edited/ folders) via the command terminal, as above.
3. Call latexdiff with a command of the following format:
- latexdiff --flatten original/main.tex edited/main.tex > compare.tex
This command combines all the constituent files in the original/ and edited/ folders into one compare document named "compare.tex".
4. The compare.tex file will appear in the parent directory; it will contain the combined latexdiff code for all the constituent files. Running a LaTeX compiler on this file will generate the desired PDF.

The parent directory with the compare file “compare.tex” generated by latexdiff.

Part of the compiled PDF of “compare.tex” showing a change in chapter.tex.
We hope that this guidance helps you successfully compile a professional compare PDF for distribution among your colleagues.
